WSL2 使用
一、安装
wsl2 安装还是很简单的,根据官网步骤来就好。Windows Subsystem for Linux Installation Guide for Windows 10,如果对官网安装不熟悉的的地方。我推荐看这个 UP 主,讲得很清楚:Window10开发环境搭建(1) | 详细演示WSL2的安装,这里我也是跟着他的视频进行的开发环境的搭建学到不少,这里给下他视频的目录:
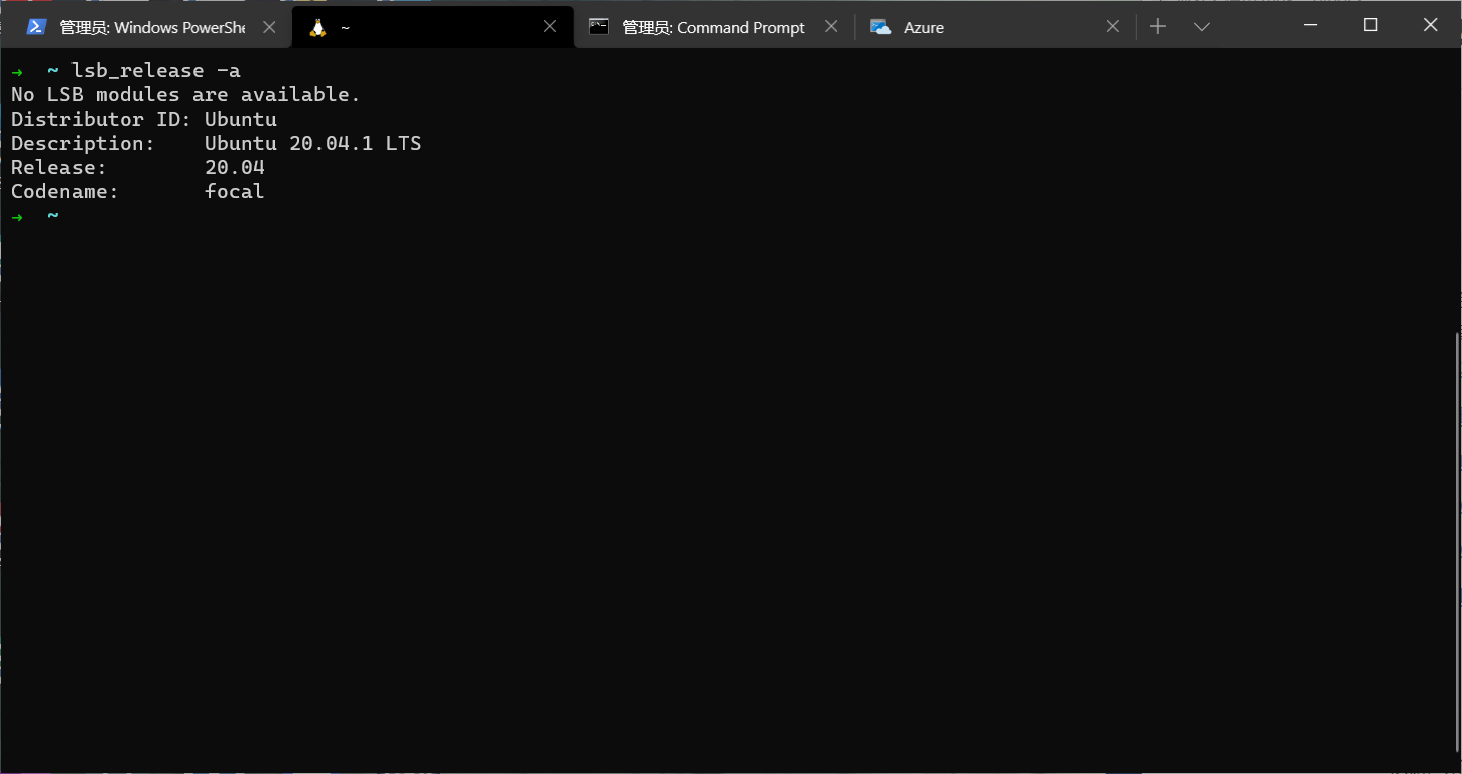
安装后输入 lsb_release -a查看系统版本

二、修改镜像
换源可能是我们安装好需要做的第一件事了,毕竟用源镜像下载有时候是真的慢。一般修改镜像方式有两种,一种是图形界面配置,另一种是手动更改
图形界面配置
推荐使用图形界面配置: 系统设置 -> 软件和更新 选择下载服务器 -> “mirrors.aliyun.com”
手动更改
用我们熟悉的编辑器打开:
/etc/apt/sources.list
替换默认的
http://archive.ubuntu.com/
为
mirrors.aliyun.com
Ubuntu 14.04.5 LTS配置如下
deb https://mirrors.aliyun.com/ubuntu/ trusty main restricted universe multiverse
deb-src https://mirrors.aliyun.com/ubuntu/ trusty main restricted universe multiverse
deb https://mirrors.aliyun.com/ubuntu/ trusty-security main restricted universe multiverse
deb-src https://mirrors.aliyun.com/ubuntu/ trusty-security main restricted universe multiverse

deb https://mirrors.aliyun.com/ubuntu/ trusty-updates main restricted universe multiverse
deb-src https://mirrors.aliyun.com/ubuntu/ trusty-updates main restricted universe multiverse

deb https://mirrors.aliyun.com/ubuntu/ trusty-backports main restricted universe multiverse
deb-src https://mirrors.aliyun.com/ubuntu/ trusty-backports main restricted universe multiverse

## Not recommended
# deb https://mirrors.aliyun.com/ubuntu/ trusty-proposed main restricted universe multiverse
# deb-src https://mirrors.aliyun.com/ubuntu/ trusty-proposed main restricted universe multiverse
ubuntu 16.04 配置如下
deb http://mirrors.aliyun.com/ubuntu/ xenial main
deb-src http://mirrors.aliyun.com/ubuntu/ xenial main

deb http://mirrors.aliyun.com/ubuntu/ xenial-updates main
deb-src http://mirrors.aliyun.com/ubuntu/ xenial-updates main

deb http://mirrors.aliyun.com/ubuntu/ xenial universe
deb-src http://mirrors.aliyun.com/ubuntu/ xenial universe
deb http://mirrors.aliyun.com/ubuntu/ xenial-updates universe
deb-src http://mirrors.aliyun.com/ubuntu/ xenial-updates universe

deb http://mirrors.aliyun.com/ubuntu/ xenial-security main
deb-src http://mirrors.aliyun.com/ubuntu/ xenial-security main
deb http://mirrors.aliyun.com/ubuntu/ xenial-security universe
deb-src http://mirrors.aliyun.com/ubuntu/ xenial-security universe
ubuntu 18.04(bionic) 配置如下
deb http://mirrors.aliyun.com/ubuntu/ bionic main restricted universe multiverse
deb-src http://mirrors.aliyun.com/ubuntu/ bionic main restricted universe multiverse

deb http://mirrors.aliyun.com/ubuntu/ bionic-security main restricted universe multiverse
deb-src http://mirrors.aliyun.com/ubuntu/ bionic-security main restricted universe multiverse

deb http://mirrors.aliyun.com/ubuntu/ bionic-updates main restricted universe multiverse
deb-src http://mirrors.aliyun.com/ubuntu/ bionic-updates main restricted universe multiverse

deb http://mirrors.aliyun.com/ubuntu/ bionic-proposed main restricted universe multiverse
deb-src http://mirrors.aliyun.com/ubuntu/ bionic-proposed main restricted universe multiverse

deb http://mirrors.aliyun.com/ubuntu/ bionic-backports main restricted universe multiverse
deb-src http://mirrors.aliyun.com/ubuntu/ bionic-backports main restricted universe multiverse
ubuntu 20.04(focal) 配置如下
deb http://mirrors.aliyun.com/ubuntu/ focal main restricted universe multiverse
deb-src http://mirrors.aliyun.com/ubuntu/ focal main restricted universe multiverse

deb http://mirrors.aliyun.com/ubuntu/ focal-security main restricted universe multiverse
deb-src http://mirrors.aliyun.com/ubuntu/ focal-security main restricted universe multiverse

deb http://mirrors.aliyun.com/ubuntu/ focal-updates main restricted universe multiverse
deb-src http://mirrors.aliyun.com/ubuntu/ focal-updates main restricted universe multiverse

deb http://mirrors.aliyun.com/ubuntu/ focal-proposed main restricted universe multiverse
deb-src http://mirrors.aliyun.com/ubuntu/ focal-proposed main restricted universe multiverse

deb http://mirrors.aliyun.com/ubuntu/ focal-backports main restricted universe multiverse
deb-src http://mirrors.aliyun.com/ubuntu/ focal-backports main restricted universe multivers
三、问题总结
当我使用
sudo apt-get install <packagename>报如下错误信息错
E: Unable to correct problems, you have held broken packages.然后 Google 一种解决方案
Solved. It turned out that my /etc/apt/sources.list is old, so I did copy the list from here, run
sudo apt update
sudo apt upgrade
And everything worked.
备份一下 Ubuntu 20.04 LTS (Focal Fossa) -- Full sources.list
因为换源把原文件修改了,但是在安装库的时候,报错,怎么更新修改都没用,最后换成源文件,重新 update 好了。
- 留个坑未填(还是没解决换源问题,我再找适合的镜像,因为现在有用,就暂且不换了,下次一定填坑 hhhhhhh)
deb http://archive.ubuntu.com/ubuntu/ focal main restricted universe multiverse
deb-src http://archive.ubuntu.com/ubuntu/ focal main restricted universe multiverse

deb http://archive.ubuntu.com/ubuntu/ focal-updates main restricted universe multiverse
deb-src http://archive.ubuntu.com/ubuntu/ focal-updates main restricted universe multiverse

deb http://archive.ubuntu.com/ubuntu/ focal-security main restricted universe multiverse
deb-src http://archive.ubuntu.com/ubuntu/ focal-security main restricted universe multiverse

deb http://archive.ubuntu.com/ubuntu/ focal-backports main restricted universe multiverse
deb-src http://archive.ubuntu.com/ubuntu/ focal-backports main restricted universe multiverse

deb http://archive.canonical.com/ubuntu focal partner
deb-src http://archive.canonical.com/ubuntu focal partner
Tips
环境变量生效
# source /etc/profile 相关资料
Windows Subsystem for Linux Installation Guide for Windows 10


